All Categories
Featured
Table of Contents
- – Plumber Shower Installation Carlsbad, CA
- – Black Mountain Plumbing
- – Best Plumber Carlsbad, CA
- – Plumber For Clogged Toilet Near Me Carlsbad, CA
- – Gas Line Plumber Carlsbad, CA
- – Plumbers In Carlsbad, CA
- – Water Leak Repair Carlsbad, CA
- – Near Me Plumber Carlsbad, CA
- – Best Plumber Carlsbad, CA
- – Plumbing Installation Near Me Carlsbad, CA
- – Plumber Company Near Me Carlsbad, CA
- – Residential Plumbing Services Near Me Carlsb...
- – Water Heater Installers Carlsbad, CA
- – Local Plumbing Near Me Carlsbad, CA
- – Plumber Company Near Me Carlsbad, CA
- – Black Mountain Plumbing
Plumber Shower Installation Carlsbad, CA
Black Mountain Plumbing
9909 Hibert Street Suite E San Diego, CA 92131(858) 536-4161
Black Mountain Plumbing
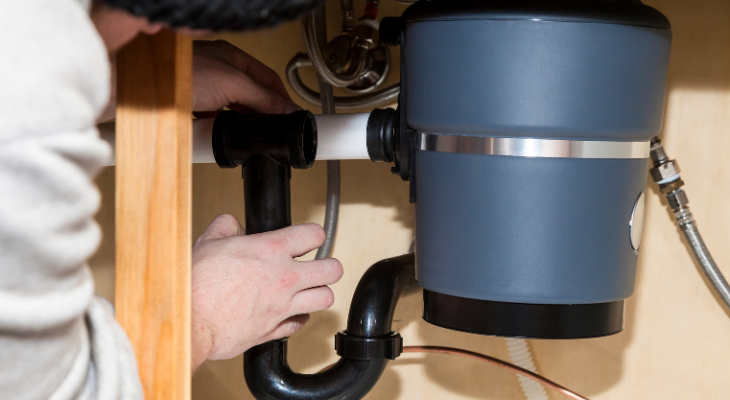
Try to find any kind of locations where you might have water dripping. If you have a dishwashing machine, and you've attached the disposal to it, transform it on so that you can inspect for water leakages there. If you do observe leaks, you can return and tighten up things without excessive hassle.
Fact-checked by Tom Grupa Waste disposal setup sets you back $250 to $650 total for new retrofits. The average price to replace a waste disposal unit is $200 to $550 with existing connections. Labor expenses to replace a waste disposal unit are $100 to $250. A brand-new waste disposal unit costs $100 to $300. Waste disposal unit installation cost Project Average complete cost installed Install brand-new waste disposal unit Replace an existing waste disposal unit Install a new cooking area sink Mount a new kitchen tap * Expense information is from study and task prices reported by HomeGuide participants.
Piping Replacing sink drain pipes costs $100 to $350 for any kind of necessary alterations or repairs during installation. Retrofitting a disposal Placing in a brand-new rubbish disposal device where none existed is the most pricey installation.
Best Plumber Carlsbad, CA
Permits An electrical permit expenses $50 to $350 for including a brand-new electrical outlet or electrical wiring upgrades for the disposal. A plumbing permit costs $30 to $500 when mounting pipelines in a location where none existed in the past.
These costs are for replacements with beneficial website problems. Modifying or including plumbing piping and electrical job cost extra. Home Depot vs. Lowe's waste disposal unit installation price Shop Labor expense to change Home Depot Lowe's * Costs omitting the cost of a new trash disposal system. The complying with table reveals materials and devices to update a trash disposal: Waste disposal unit devices and supplies cost Device Average set you back Summary Dish washer port set Links dishwasher drain to waste disposal unit Assists prevent clogs Push-button system Alternate to a wall switch Installs to sink or kitchen counter Comes as a total set Baffle/ placing gasket Stifles disposer noise Protects against water & food from splashing up Inhibits microorganisms growth Easy to set up Septic-assist cartridge substitute enzymes Refills septic-solution dispenser cartridges for septic-assist waste disposal unit Breaks down food waste faster to stop septic-tank clogs Protects against odors Sink flange Seals the link in between the sink basin & disposal Is available in lots of styles & shades Removable basket filter optional Power cord accessory package Changes an old wire Usage when a hard-wired connection isn't readily available The price to remove a waste disposal unit is $25 to $50 while replacing the unit or $125 to $350 for irreversible removals.
Long-term eliminations require a new basket filter and draining pipelines in the sink. The cost to mount a new kitchen sink, faucet, and waste disposal is $780 to $2,550 generally, including all materials and labor. This cost consists of component substitutes just making use of existing pipes without adding any brand-new connections.
Plumber For Clogged Toilet Near Me Carlsbad, CA
Grind-chamber ability Disposal units with 22-oz. to 26-oz. chambers are less costly and just grind tiny quantities at once. Attributes Models with quieter procedure, anti-jamming sensors, and overload security are the most expensive. Feed kind Continuous-feed models are the most affordable and most typical. Batch-feed devices are much safer yet set you back even more and grind slower.
The following table shows prices of trash disposals by brand name and motor size. The price of a garbage disposal likewise depends on the high quality of the products and whether it grinds in sets or constantly.
Gas Line Plumber Carlsbad, CA
Replacing a disposal is a lot more cost-efficient when repair work set you back even more than fifty percent of the substitute rate, or if a disposal is greater than 8 years old. Break out quotes from waste disposal unit setup companies near you. Price to change vs. deal with a waste disposal Service Ordinary cost mounted Repair service Replace The best-size garbage disposal commonly has 1/2 to 3/4 horse power, which suffices for most typical family members needs.
The ordinary garbage disposal lifespan is 8 to 12 years. Most units have guarantees that last 3 to ten years. A top quality disposal mounted properly according to supplier standards has the lengthiest lifespan. Waste disposal unit need this upkeep to last much longer: Run cool water while the disposal is grinding. Keep the disposal competing an extra min after grinding waste.
Prior to employing a trash disposal installment firm near you, make certain to: Contrast multiple cost estimates from skilled installers. Ask for proof of plumbing certification or various other regional training. Verify that the firm has licenses, insurance coverage, and guaranty bonds. Review their evaluations on HomeGuide and Google. Accumulate copies of the comprehensive price quote, agreement, and service warranties.
Time is important, and we value your own. Our group arrives quickly and supplies a clear timeline for the completion of the installation. We adhere to our timetable, enabling you to intend your day without any type of trouble. We aim to make the payment process as practical as feasible by accepting all major charge card.
Plumbers In Carlsbad, CA
Openness is necessary to us. We offer free estimates for all our services, enabling you to recognize the costs upfront. Additionally, our specialists give consultations to assist you make informed decisions about your plumbing needs. We comprehend that cleanliness is vital. Our plumbings make sure to tidy up after the setup, leaving your kitchen area pristine.
Our team is understood for providing quality customer service with a tried and tested performance history of dependability (Shower Repair Carlsbad). We treat your home with respect and guarantee that our workplace is spick-and-span after finishing the job. We utilize the most up to date modern technology and techniques in the pipes sector to give efficient and reliable services
Your garbage disposal can prevent these obstructions by grinding up anything that drops into it. Below we take a look at how garbage disposals are installed and just how long it can take.
Water Leak Repair Carlsbad, CA
This includes taking measurements to position the disposal, getting rid of pipes, installing the disposal, and fitting new pipelines to make the entire system job once again. This procedure needs precision to make certain that all of the pipelines fit without giving up all of your storage space.
It depends on exactly how the old and brand-new disposals contrast to every various other. If they are a close fit, after that it ought to be easy to change one with the various other. Mounting a trash disposal doesn't have to take long, but you must leave it to a knowledgeable plumbing professional to avoid any type of issues.
Near Me Plumber Carlsbad, CA
Trash disposals (GD) are essential devices in modern-day cooking areas, aiding in the effective disposal of food waste and keeping pipelines intact. Installing this device can be an overwhelming job, usually leading to common waste disposal problems if not done appropriately. From handling quantities of food to making sure making use of awesome water for procedure, there are a number of essential elements to think about.
This write-up aims to lead you via the typical blunders to stay clear of during installment, making certain the long life and appropriate functioning of your home appliance. One of the key functions of a garbage disposal unit is to take care of food waste efficiently. A common blunder throughout installment is ruling out the kind and volume of food waste the system will deal with.
Best Plumber Carlsbad, CA
The sink flange needs to be sealed and fastened properly to stop leaks. The back-up flange, which sustains the main flange, need to additionally be looked for proper alignment. Furthermore, not making use of the anti-jamming and extra functions that come with modern disposals can bring about operational inefficiencies. Making sure that each element is properly installed adds to the durability and effectiveness of the disposal system (Shower Repair Carlsbad).
The secret to avoiding these issues exists in careful setup and proper treatment. Bear in mind, a tiny blunder can come to be a costly mistake, necessitating expert rubbish disposal repairs. Making use of tools like a hex wrench for small solutions and running great water throughout procedure can contribute substantially to the device's efficiency. By bearing in mind these pointers, you can ensure your garbage disposal offers you properly, without the problems of breakdowns and expensive repair services.
Plumbing Installation Near Me Carlsbad, CA
A rubbish disposal unit is an extremely valuable device for any type of cooking area, supplying a very easy solution for doing away with food scraps and lessening waste. The installment procedure can be complex and demands certain competence and experience. So when it concerns home renovations and repair work, working with the ideal specialist for the job is vital.
This step consists of careful placement to the sink drain, connecting water lines, and guaranteeing a leak-free configuration for reliable waste disposal. Conformity with local building ordinance and safety and security guidelines is paramount when you set up a rubbish disposal. These criteria are in area to guarantee the security and effectiveness of electric and plumbing installations in property setups.
Plumber Company Near Me Carlsbad, CA
When intending to install a waste disposal, it is essential to recognize what the procedure involves. Before the real setup, a preliminary assessment is essential. This includes examining the existing sink setup, ensuring there's adequate area under the sink for the disposal, and establishing if any type of additional pipes or electric modifications are needed.
This includes disconnecting it from the source of power, detaching it from the sink, and carefully removing any connected plumbing. Installing a garbage disposal commonly starts with constructing the system according to the supplier's guidelines. This involves connecting the mounting ring, ensuring appropriate positioning, and protecting it to the underside of the sink.
Residential Plumbing Services Near Me Carlsbad, CA
This should be done in compliance with electrical safety and security standards and may require the skills of an electrician if direct wiring is required. Connecting the disposal to the plumbing system is an important step. This includes connecting the drain lines, making certain the dish washer drain is attached if relevant, and making certain all links are limited and leak-free.
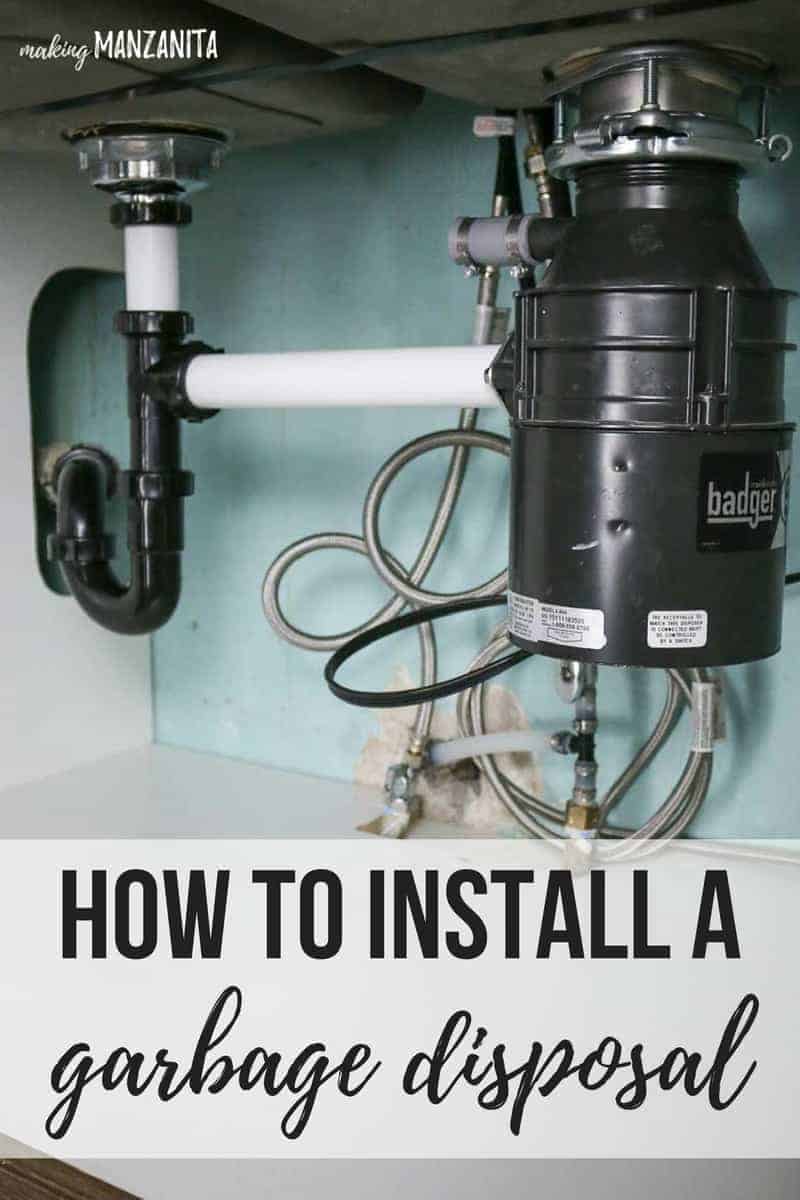
You can set up the mounting brace that will hold up your disposal. Next make the electric and dishwasher connections. Lastly you can install the disposal and hook it approximately the drain plumbing. Switch off the electric power at the circuit box or breaker. Making use of adjustable pliers disconnect the drainpipe catch from the disposal waste discharge tube.
Lift the disposal a little and loosen the lower placing ring by pressing or pulling wrenches or screwdriver to the left till the disposal is devoid of installing setting up. Lay the disposal on its side and remove the electric cover plate. Loose the environment-friendly ground screw and get rid of the cord connectors.
Water Heater Installers Carlsbad, CA
Loosen up screws on the electric clamp port and get rid of cords from the disposal. Tear the snap ring off with a screwdriver and remove the old mounting setting up, after that push the old sink flange up with the sinkhole.
Go down the new sink flange right into the drain opening and press it into place. Positioning a weight such as your disposal in addition to the sink flange will help hold the sink flange in area while mounting the sink flange to the sink. To prevent damaging your sink or the flange, place a towel in between the sink surface and the weight from under the sink.
This step includes mindful alignment to the sink drainpipe, attaching water lines, and guaranteeing a leak-free arrangement for effective garbage disposal. Conformity with neighborhood building ordinance and security laws is paramount when you mount a garbage disposal. These standards remain in area to ensure the security and effectiveness of electrical and plumbing installations in household settings.
Local Plumbing Near Me Carlsbad, CA
When preparing to set up a waste disposal unit, it is necessary to understand what the procedure requires. Prior to the actual installation, a first assessment is vital. This consists of checking the existing sink configuration, making certain there's adequate area under the sink for the disposal, and figuring out if any type of additional pipes or electric modifications are required.
This includes disconnecting it from the source of power, removing it from the sink, and very carefully eliminating any type of connected plumbing. Installing a garbage disposal usually starts with setting up the device according to the producer's instructions. This involves affixing the mounting ring, making certain appropriate positioning, and protecting it to the underside of the sink.
This need to be performed in compliance with electric security criteria and may require the skills of an electrical contractor if straight wiring is required. Linking the disposal to the pipes system is an important step. This consists of connecting the drainpipe lines, making sure the dishwashing machine drainpipe is connected if relevant, and making certain all connections are limited and leak-free.
You can install the placing bracket that will certainly hold up your disposal. Following make the electric and dishwasher links. Finally you can install the disposal and hook it approximately the drain plumbing. Switch off the electric power at the circuit box or breaker. Using flexible pliers disconnect the drainpipe catch from the disposal waste discharge tube.
Plumber Company Near Me Carlsbad, CA
Lift the disposal a little and loosen the lower mounting ring by pressing or pulling wrenches or screwdriver to the left up until the disposal is cost-free from installing setting up. Lay the disposal on its side and remove the electric cover plate. Loose the environment-friendly ground screw and get rid of the cord connectors.
Loosen up screws on the electric clamp connector and eliminate cords from the disposal. Tear the snap ring off with a screwdriver and eliminate the old placing setting up, after that press the old sink flange up with the sinkhole.
Black Mountain Plumbing
Address: 9909 Hibert Street Suite E San Diego, CA 92131Phone: (858) 536-4161
Email: blackmtnplumbing@gmail.com
Black Mountain Plumbing
Go down the brand-new sink flange into the drainpipe opening and press it into area. Placing a weight such as your disposal on top of the sink flange will help hold the sink flange in area while mounting the sink flange to the sink. To prevent scraping your sink or the flange, place a towel in between the sink surface and the weight from under the sink.
Plumber Company Near Me Carlsbad, CANear Me Plumber Carlsbad, CA
Water Leak Repair Carlsbad, CA
Plumbing Installation Carlsbad, CA
Plumbing Installation Services Carlsbad, CA
Plumbing Installation Near Me Carlsbad, CA
Shower Repair Near Me Carlsbad, CA
Best Plumbing Carlsbad, CA
Bathroom Plumber Carlsbad, CA
Plumbing Installation Services Carlsbad, CA
Garbage Disposal Installation Carlsbad, CA
Plumber Company Near Me Carlsbad, CA
Water Filtration Services Near Me Carlsbad, CA
Plumbing Installers Near Me Carlsbad, CA
Gas Line Plumber Carlsbad, CA
Water Filtration Services Near Me Carlsbad, CA
Shower Repair Carlsbad, CA
Garbage Disposal Installation Carlsbad, CA
Best Plumbing Carlsbad, CA
Plumber For Clogged Toilet Near Me Carlsbad, CA
Shower Repair Near Me Carlsbad, CA
Bathroom Plumber Carlsbad, CA
Residential Plumber Carlsbad, CA
Water Heater Installers Carlsbad, CA
Water Leak Repair Carlsbad, CA
Best Plumbing Carlsbad, CA
Shower Repair Carlsbad, CA
Near Me Plumber Carlsbad, CA
Water Leak Repair Carlsbad, CA
Plumbing Installation Services Carlsbad, CA
Best Plumber Carlsbad, CA
Affordable Plumbing Near Me Carlsbad, CA
Best Plumber Carlsbad, CA
Best Plumber Carlsbad, CA
Water Filtration Services Near Me Carlsbad, CA
Garbage Disposal Installation Carlsbad, CA
Residential Plumbing Services Near Me Carlsbad, CA
Water Filtration Services Near Me Carlsbad, CA
Garbage Disposal Installation Carlsbad, CA
Best Plumbing Carlsbad, CA
Garbage Disposal Installation Carlsbad, CA
Plumber Company Near Me Carlsbad, CA
Affordable Plumbing Near Me Carlsbad, CA
Residential Plumbing Services Near Me Carlsbad, CA
Shower Repair Near Me Carlsbad, CA
Affordable Plumbing Near Me Carlsbad, CA
Plumber Company Near Me Carlsbad, CA
Local Plumber Carlsbad, CA
Near Me Plumber Carlsbad, CA
Shower Repair Near Me Carlsbad, CA
Residential Plumber Carlsbad, CA
Water Leak Repair Carlsbad, CA
Near Me Plumber Carlsbad, CA
Plumbing Installation Carlsbad, CA
Near Me Plumber Carlsbad, CA
Water Line Repair Carlsbad, CA
Best Plumbing Carlsbad, CA
Water Heater Installers Carlsbad, CA
Water Heater Installers Carlsbad, CA
Local Plumber Carlsbad, CA
Local Plumbing Near Me Carlsbad, CA
Gas Line Plumber Carlsbad, CA
Affordable Plumber Near Me Carlsbad, CA
Kitchen Plumbing Carlsbad, CA
Shower Repair Carlsbad, CA
Garbage Disposal Installation Carlsbad, CA
Gas Line Plumber Carlsbad, CA
Plumber Toilet Repair Carlsbad, CA
Affordable Plumbing Near Me Carlsbad, CA
Kitchen Plumbing Carlsbad, CA
Gas Line Plumber Carlsbad, CA
Near Me Plumber Carlsbad, CA
Bathroom Plumber Carlsbad, CA
Kitchen Plumbing Carlsbad, CA
Plumber For Clogged Toilet Near Me Carlsbad, CA
Affordable Plumber Near Me Carlsbad, CA
Water Leak Repair Carlsbad, CA
Kitchen Plumbing Carlsbad, CA
Shower Repair Carlsbad, CA
Local Plumbing Near Me Carlsbad, CA
Around Me Seo Companies Near Me Carlsbad, CA
Around Here Seo Services Pricing Carlsbad, CA
Shower Repair Carlsbad, CA
Black Mountain Plumbing
Table of Contents
- – Plumber Shower Installation Carlsbad, CA
- – Black Mountain Plumbing
- – Best Plumber Carlsbad, CA
- – Plumber For Clogged Toilet Near Me Carlsbad, CA
- – Gas Line Plumber Carlsbad, CA
- – Plumbers In Carlsbad, CA
- – Water Leak Repair Carlsbad, CA
- – Near Me Plumber Carlsbad, CA
- – Best Plumber Carlsbad, CA
- – Plumbing Installation Near Me Carlsbad, CA
- – Plumber Company Near Me Carlsbad, CA
- – Residential Plumbing Services Near Me Carlsb...
- – Water Heater Installers Carlsbad, CA
- – Local Plumbing Near Me Carlsbad, CA
- – Plumber Company Near Me Carlsbad, CA
- – Black Mountain Plumbing
Latest Posts
Villa Park Internet Marketing Seo Services
Insurance Companies For Seniors Westminster
Best Insurance Companies For Seniors Aliso Viejo
More
Latest Posts
Villa Park Internet Marketing Seo Services
Insurance Companies For Seniors Westminster
Best Insurance Companies For Seniors Aliso Viejo