All Categories
Featured
Table of Contents
- – Replacement Rv Windows Atwood, CA
- – OCRV Center
- – Replacement Windows For Campers Atwood, CA
- – Replacement Windows For Campers Atwood, CA
- – Replacement Windows For Campers Atwood, CA
- – Replace Rv Flooring Atwood, CA
- – Rv Replacement Awnings Atwood, CA
- – Rv Chairs Atwood, CA
- – Rv Sofas Atwood, CA
- – Rv Upholstery Atwood, CA
- – Rv Interior Remodel Atwood, CA
- – Replacement Windows For Rv Atwood, CA
- – Rv Replacement Furniture Atwood, CA
- – Rv Couch Bed Atwood, CA
- – OCRV Center
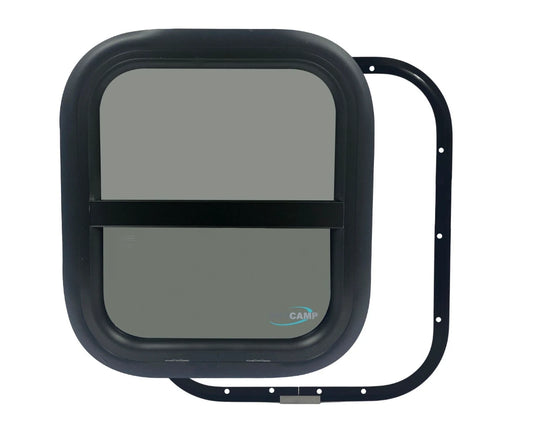
Replacement Rv Windows Atwood, CA
Other terms for this type of window seal can be glazing or window trim. Example of stationary window After you have actually confirmed your home window kind, currently it's time to find the replacement seal.
This "picture" is a very crucial piece to the puzzle. The second item of the problem is understanding the dimensions of your account (see what locations you need to measure with the example images below). Furthermore, you'll need to have an approximate footage in mind so you know how much to get.
When you're shopping online, remember that some manufacturers just supply their seals at a minimum or pre-cut lengths. That will not help every project. Ensure that the maker you acquire from offers by the foot options so you have control of cost and length. Scraper/Tuck Device a terrific device for eliminating the old seal, and pushing the new seal in position Loctite Super Bonder 495 not necessary, however will add safety in edges if you have to make any type of changes Adhesive Cleaner the recreational vehicle maker might have made use of adhesive to apply the original seal.
These chemicals can be dangerous otherwise utilized best If you don't have whatever on this list, we have actually got you covered! See our Devices & Adhesive section. Some might be readily available at your regional vehicle components store. Begin by (thoroughly) eliminating the window. Location the window on a sheet covered table to avoid scratching.
Replacement Windows For Campers Atwood, CA
Sticky eliminator is especially convenient here. It will certainly strip whatever off the window structure including any adhesive that might have been Clean the motor home framework, or network where the home window sits. You will certainly want a clean surface area for your new seal As soon as everything is tidy, take your new seal and press right into location.
You're looking for a tight and secure fit You might locate that it's simpler to press into location corner by edge. Press an edge right into place, after that another edge. Round off by pressing every little thing in-between right into area. Gaskets will make a distinct sound when they have snapped right into location. Something else to note: some setups may require you to eliminate the glass from the window structure.
Replacement Windows For Campers Atwood, CA
After the glass is removed, the seal installment should be the very same as detailed over. If you have concerns regarding weatherstripping for your timeless car, street pole, RECREATIONAL VEHICLE, or watercraft, don't think twice to call us!
RV home window replacement is one of the simplest diy projects. All you do is remove a couple of screws, stand out the old window out, apply sealant, and stand out the new home window in. Naturally there are a couple of added actions, which we'll reach in a moment, but that's the basic treatment.
You can go with a different home window kind if you such as. Replacement options include fixed pane, moving pane, jalousie, awning, frameless, and egress. If you want much better insulation from the warm and the chilly, you can update from single pane to double pane home windows. There are likewise numerous tones and shades of tinting that can be put on the window.
Accurately gauging the dimensions of your old window, or your home window opening, is vital when purchasing replacements. A lot of camper home windows are custom made, and returns are normally not accepted. Repaired pane/awning window combination by Kinro Most of recreational vehicle windows are clamp ring installed. That means the RV sidewall is sandwiched between an outside window structure and an interior trim ring.
Replacement Windows For Campers Atwood, CA
Stress holds the home window in location. Placing screws get on the within of the window, leaving a smooth look on the outside. Substitute motor home windows typically come packaged with interior trim rings, screws, and putty tape, so no added hardware is required. Someone can replace a home window, though it will certainly be bit much easier with 2 individuals, particularly if it's a big home window.
If you're changing all the windows on your camper, you'll probably shave off some of that time after doing a couple. Philips Screwdriver Putty Blade, Scraper Tool, or Flat Head Screwdriver Silicone Sealant Spray Bottle of Water Ruler or Tape Measure Tape, if no helper is readily available (blue painter's tape works best) The initial 3 steps include getting rid of the old window and sealer From inside the Motor home, start by removing the drapes and blinds.
Replace Rv Flooring Atwood, CA
Now you'll get rid of the screws from the inside window trim ring. There will be 12 or even more screws below. Before getting rid of the last couple of screws, you'll need an assistant to stand up the home window on the outside to avoid it from being up to the ground. If no helper is offered, tape can be utilize to stand up the window.
Greater than likely, the window will still be kept in area by caulking and putty tape. Currently you'll relocate outside the motor home, and with a putty blade under the exterior window flange, very carefully pry the home window out from the sidewall. It aids to have another individual hold onto the home window while you pry it out.
A clean surface will certainly offer a far better hold for the new putty tape and caulking, and make a far better seal. Now it's time to appear that glossy new RV window and seal the deal Dry fit the new motor home window first, to make sure it fits appropriately. Do this by positioning the window in the opening, with no putty tape.
Rv Replacement Awnings Atwood, CA
There should be at least 3/8 overlap. This overlap gives a great seal between the home window and sidewall. If there is less overlap on top, you'll need to utilize shims to elevate the window up from all-time low. The home window must be focused in the window opening, both up and down and flat.
Use the supplied putty tape to the motor home sidewall around the boundary of the window opening. Way too much putty tape is much better than too little. You don't want any kind of gaps for water to creep in between the outside window flange and the RV sidewall. Any kind of excess will certainly be squeezed out when the indoor trim ring is screwed in position.
This will avoid the window from sticking to the putty tape, offering you some time to focus the home window. Currently install the home window, centering it in the window opening.
When the screws are tightened up, go outdoors and check that there are no spaces in the putty tape. Apply extra putty tape if necessary. Cut off any kind of excess putty tape. For additional insurance against water damages, apply a bead of clear silicone sealer around the home window structure. Ravel the sealant with a flat head screwdriver or finger moistened with your spray bottle.
Rv Chairs Atwood, CA
A RV is component home and part lorry, and in some cases, after the "home" has actually been driven for miles and miles over bumpy roadways, upkeep concerns can occur. Among the potential repairs that a recreational vehicle proprietor may deal with is a RV window replacement. We encountered this issue numerous years back and satisfied it head-on with our desire to DIO (Do It Ourselves) as most of our very own RV maintenance and repair work projects as possible.
These are the tools we required for our camper window substitute. Depending on your Motor home, you may or might not need all of these devices for your project.
No issue where you purchase your new motor home window, you'll need to offer exact measurements. Let's damage down our procedure for determining a RV window for replacement. Begin by getting rid of any home window valance, blinds, or shades. Next off, get rid of all screws around the border of the window, and remove the within frame.
Rv Sofas Atwood, CA
Do not place any type of outward stress on the window while taking your measurements or it could come loosened and loss. For extra security, you may intend to have a helper on a ladder outside, holding the window in position while you determine. Thoroughly eliminate the framework of your old window to make sure that you can gauge the opening (NOT the window itself).

For our rectangular home window, we needed to take only four dimensions. It's a great idea to take dimensions at a number of points so you have a concept of how cleanly the window opening was cut.
Rv Upholstery Atwood, CA
Dimensions of the old window and the home window opening are commonly different. Home window manufacturers utilize filler strips to keep the window degree and snug.
Take your time to obtain an accurate dimension, and double-check it by determining a second time. Specific measurements are important to RV window substitute. Take a close look at your tape procedure and be sure you recognize which are the 1/16th-inch dimensions.
Rv Interior Remodel Atwood, CA
The window makers are the ideal authorities on installing their products. Rv Couch Atwood. The supplier of your new RV window has likely consisted of helpful standards or tips to make the installation easier.
There may be a grain of sealer around the top of your old window or in between the outer window structure and the RV's sidewall. If so, you'll need to eliminate this previous to getting rid of the old home window. Transferring to the outside of the recreational vehicle, use your plastic putty knife (yes PLASTIC, to stay clear of scraping your recreational vehicle's coating) to meticulously damage the seal around the old window and remove it.
Replacement Windows For Rv Atwood, CA
Make certain the window is OPEN so that you can securely understand the window as it befalls of the opening, when the seal is broken. Remove any staying sealer utilizing your plastic putty knife, and wipe any staying particles utilizing mineral spirits. Give the area a final cleaning making use of massaging alcohol to ensure that the area around the home window opening is devoid of any kind of oily deposit.
Begin by establishing your brand-new home window on a level surface covered with a soft cloth, with the beyond the window facing down. Tidy completely around the edge with rubbing alcohol and a clean towel. This will certainly guarantee that the surface is free from all residue. Utilizing the consisted of roll of double-sided, closed-cell foam tape, apply the tape.
Rv Replacement Furniture Atwood, CA
Measurements of the old home window and the home window opening are frequently different. Window makers make use of filler strips to maintain the home window level and snug.
Step two times, cut as soon as, right? Take your time to obtain an exact measurement, and verify it by measuring a 2nd time. Precise measurements are essential to RV window replacement. We do not intend to loosely measure and assemble or down. Constantly measure to the closest 1/16th of an inch. Take a close consider your tape step and make sure you understand which are the 1/16th-inch dimensions.
The home window suppliers are the very best authorities on installing their items. The producer of your brand-new RV home window has most likely included handy standards or ideas to make the installment simpler. These kinds of directions are frequently consisted of on producers' sites also. If your brand-new home window came with directions in the plan, make sure to maintain those useful as they may have outlined step-by-step directions in a consisted of booklet.
Rv Couch Bed Atwood, CA
There may be a grain of sealant around the top of your old home window or in between the external home window frame and the RV's sidewall. If so, you'll require to eliminate this before getting rid of the old home window. Relocating to the beyond the motor home, utilize your plastic putty blade (yes PLASTIC, to avoid scratching your recreational vehicle's surface) to meticulously damage the seal around the old home window and remove it.
Make sure the window is OPEN to make sure that you can firmly understand the home window as it falls out of the opening, once the seal is broken. Remove any continuing to be sealer utilizing your plastic putty knife, and clean off any kind of remaining particles utilizing mineral spirits. Provide the area a final cleansing utilizing scrubing alcohol to make sure that the area around the home window opening is without any kind of oily residue.
OCRV Center
Address: 23281 La Palma Ave Yorba Linda, CA 92887Phone: (714) 909-1444
Email: art@ocrvcenter.com
OCRV Center
Begin by establishing your new window on a flat surface area covered with a soft cloth, with the outside of the home window encountering down. Utilizing the consisted of roll of double-sided, closed-cell foam tape, use the tape.
Rv Interior Remodel Atwood, CAAwnings For Rv Atwood, CA
Replacement Windows For Campers Atwood, CA
Rv Replacement Awnings Atwood, CA
Rv Refrigerator Replacement Atwood, CA
Replacement Rv Windows Atwood, CA
Rv Sofa Sleeper Atwood, CA
Rv Sofa Beds Atwood, CA
Motorhome Carpets Atwood, CA
Replacement Rv Windows Atwood, CA
Rv Replacement Furniture Atwood, CA
Replacement Windows For Rv Atwood, CA
Rv Microwave Replacement Atwood, CA
Remodeling Rv Atwood, CA
Awnings For Trailers Atwood, CA
Rv Replacement Awnings Atwood, CA
Rv Restoration Companies Atwood, CA
Replace Rv Flooring Atwood, CA
Awnings For Trailers Atwood, CA
Rv Carpet Installation Atwood, CA
Rv Carpet Replacement Atwood, CA
Replacement Rv Refrigerator Atwood, CA
Rv Interior Furniture Atwood, CA
Rv Interior Furniture Atwood, CA
Rv Replacement Furniture Atwood, CA
Rv Chairs Atwood, CA
Rv Sofa Sleeper Atwood, CA
Rv Sofa Beds Atwood, CA
Rv Replacement Awnings Atwood, CA
Rv Couch Atwood, CA
Remodeling Rv Atwood, CA
Awnings For Trailers Atwood, CA
Rv Dinette Table Atwood, CA
Rv Dining Table Atwood, CA
Awning Installation Atwood, CA
Rv Carpet Replacement Atwood, CA
Remodeling Rv Atwood, CA
Rv Replacement Awnings Atwood, CA
Rv Carpet Installation Atwood, CA
Replacement Rv Windows Atwood, CA
Rv Microwave Replacement Atwood, CA
Rv Dinette Table Atwood, CA
Rv Carpet Replacement Atwood, CA
Rv Floor Replacement Atwood, CA
Rv Chairs Atwood, CA
Awning Installation Atwood, CA
Rv Replacement Furniture Atwood, CA
Awning Installation Atwood, CA
Motorhome Carpets Atwood, CA
Rv Interior Furniture Atwood, CA
Replacement Rv Refrigerator Atwood, CA
Remodeling Rv Atwood, CA
Replacement Rv Windows Atwood, CA
Remodeling Rv Atwood, CA
Replacement Windows For Campers Atwood, CA
Rv Couch Atwood, CA
Rv Sofa Sleeper Atwood, CA
Rv Interior Furniture Atwood, CA
Rv Chairs Atwood, CA
Rv Restoration Companies Atwood, CA
Rv Microwave Replacement Atwood, CA
Remodeling Rv Atwood, CA
Awning Installation Atwood, CA
Rv Floor Replacement Atwood, CA
Rv Replacement Furniture Atwood, CA
Rv Microwave Replacement Atwood, CA
Rv Microwave Replacement Atwood, CA
Rv Replacement Furniture Atwood, CA
Remodeling Rv Atwood, CA
Rv Sofa Beds Atwood, CA
Rv Microwave Replacement Atwood, CA
Awning Installation Atwood, CA
Replacement Rv Windows Atwood, CA
Rv Replacement Furniture Atwood, CA
Rv Carpet Replacement Atwood, CA
Rv Dinette Booth Atwood, CA
Rv Couch Atwood, CA
Awnings For Trailers Atwood, CA
Near My Location Seo Company Atwood, CA
Near Seo For Law Firms Atwood, CA
OCRV Center
Table of Contents
- – Replacement Rv Windows Atwood, CA
- – OCRV Center
- – Replacement Windows For Campers Atwood, CA
- – Replacement Windows For Campers Atwood, CA
- – Replacement Windows For Campers Atwood, CA
- – Replace Rv Flooring Atwood, CA
- – Rv Replacement Awnings Atwood, CA
- – Rv Chairs Atwood, CA
- – Rv Sofas Atwood, CA
- – Rv Upholstery Atwood, CA
- – Rv Interior Remodel Atwood, CA
- – Replacement Windows For Rv Atwood, CA
- – Rv Replacement Furniture Atwood, CA
- – Rv Couch Bed Atwood, CA
- – OCRV Center
Latest Posts
Rv Repairs Near Me Placentia
Recreational Vehicle Repair Montclair
Commercial Hood Installation Burbank
More
Latest Posts
Rv Repairs Near Me Placentia
Recreational Vehicle Repair Montclair
Commercial Hood Installation Burbank