All Categories
Featured
Table of Contents
- – Carbon Monoxide Detector Installation Beverly H...
- – Instant Air Solutions
- – Industrial Exhaust Ventilation Systems Beverly...
- – Exhaust Fan Installers Near Me Beverly Hills, CA
- – Garage Wall Exhaust Fan Beverly Hills, CA
- – Garage Exhaust Fan Beverly Hills, CA
- – Industrial Air Ventilation Systems Beverly H...
- – Exhaust Fan Installer Near Me Beverly Hills, CA
- – Carbon Monoxide Detector Installation Beverl...
- – Exhaust Fan Installation Service Beverly Hil...
- – Instant Air Solutions
Carbon Monoxide Detector Installation Beverly Hills, CA
I've had garage ventilation on my mind for a long time now. Between Eileen and I constantly doing jobs in the garage, we produce a great deal of fumes from painting and staining. Cutting wood in there also throws a lot of sawdust into the air. Also when I work with the mower and other small engines in there, the odor of gasoline lingers.
Nevertheless, this was not the optimal remedy. Many paint and staining tasks would being in the garage overnight filling the air with fumes, just to be broadcast out when the sunlight came up and when we can open the garage doors. In addition to the toxic smells being in the garage the following early morning, it would certainly likewise postpone the completion of these jobs.
To include in the pressure, I recently obtained a snow blower for the upcoming winter months snowstorms, and that was bound to leave the garage loaded with gas odors after usage. Even extra factor to check into garage ventilation systems. Exhaust Fan Installer Near Me Beverly Hills. So I put my reasoning cap on and wandered around the garage seeking ventilation ideas.
In my previous home, I made use of to run a great deal of computer system tools in the garage that would produce a lot of heat. I had investigated garage airing vent choices at that time and worked out on a little fan and vent that could be installed straight in the garage door (by means of a little hole that you reduced).
Industrial Exhaust Ventilation Systems Beverly Hills, CA
Throughout the winter months, the garage door vent would allow all the cool air in and drop the garage temperature level below the cold point, ruining my paints and other fluids that were not suggested to be frozen. The garage door vents and exhaust choice left a bad preference in my mouth since, and I was determined not to pursue that direction again.
I lastly decided on a means of airing vent the garage. I would certainly discover a perfect airing vent place in the garage, and cut a big square hole in the wall surface (about 14"x14" in between the wall surface studs). I would certainly mount self-closing shutter vents on both the interior and outside of the wall surface.
Exhaust Fan Installers Near Me Beverly Hills, CA
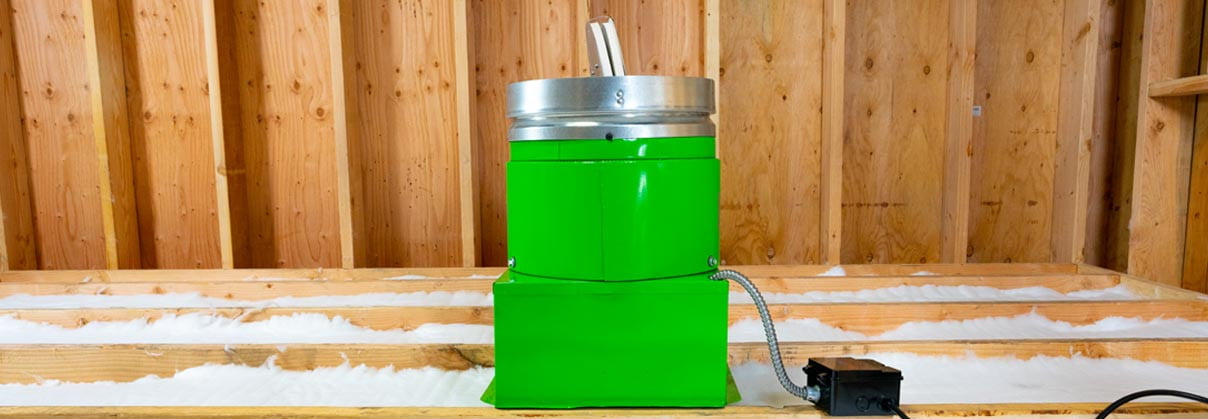
The dual shutter vents were mosting likely to be type in assisting to maintain the cold air outside during the winter season. I did a great deal of research on exhaust followers and made a decision on one with integrated shutters. I purchased a 14" size follower qualified of 800 CFM. No wiring was needed with this particular version because it simply connects into an electrical outlet.
For the exterior wall, I went a 14" aluminum shutter vent (Exhaust Fan Installer Near Me Beverly Hills). With the hardware recognized, I tried to find an excellent location for the vent. The finest place would certainly have been above one of the garage doors, however, for visual appeals, I really did not want the air vent to be noticeable from the road
Right here's the area I picked inside for the garage exhaust follower: Right here's where the air vent would certainly exhaust outside: Above, you'll see the first layer I went via was the drywall. Following was the white vinyl exterior siding.
The fan would cover all the edges, and hide any abnormalities in my cut. This was a needed step to protect against the fan from venting air right into the wall.
Garage Wall Exhaust Fan Beverly Hills, CA
I could not just reduce a hole in the exterior siding, put the air vent, and stop. To maintain water from permeating the siding, I required to use J channel. This would certainly enable me to produce a structure around the air vent that would overlap the house siding and shield the rough-cut edges from water.
I complied with some fantastic directions on (under the section "Set up J-channel around the window"). Here's an image showing the constructed J channel pieces twisting around the vent: Now came the fun job of dealing with the exterior siding. To effectively install the outside vent, I needed accessibility to the wall below the siding, which meant getting rid of a number of items of siding.
With the assistance of a exterior siding elimination device, I had the ability to quickly remove some siding, and draw it away from the wall surface. With sufficient of the siding off the beaten track, I had the ability to proceed job on the opening. To aid with the waterproofing, I made use of some blinking tape (leftover from my shed task) to seal in the edges of the opening.
Garage Exhaust Fan Beverly Hills, CA
Next, I placed the shutter air vent and accomplished in the wall surface studs. Right here's an image revealing some progress: With the garage vent in location, I connected the J network framework, overlapping the rough cut edges of the vinyl home siding. Right here's a close-up revealing the finished outside wall with J channel: Looks very expert, doesn't it? It must be extremely leak-proof as well.
I inserted the exhaust follower in the red and was obtaining ready to screw it into the studs. I chose to examine the vents on the fan to make certain they opened and closed correctly. They opened up fine. However, they had difficulty closing. They would certainly stick on the means down and not close completely.
After some fiddling, I uncovered that the hole I reduced was as well snug of a fit for the fan framework. It was distorting the frame ever so a little to create the shutters to not shut appropriately. If I drew the follower regarding 2 inches out of the wall surface, the shutters worked fine.
I would certainly built a 24 wood framework in between the wall surface and the fan, to provide the exhaust follower sufficient range from the opening for the shutters to operate correctly. I actually invested just 10 mins on this job I cut some 2x4s to length with the miter saw. After that I attached them to each various other with pocket opening screws to develop a framework.
Industrial Air Ventilation Systems Beverly Hills, CA
Below's an image of the garage wall exhaust follower structure (the pocket openings are hidden on the other side): Finally, the exhaust follower might be bolted to the wall surface. I pushed the fan against the 24 framework and saw to it the shutters opened and shut freely. I attached the follower to the 2x4s with some heavy-duty screws.
As the follower rate boosted to full, both the within and outside shutters opened up to tire the garage. Here's an image of the installed garage wall surface exhaust follower (powered on) from the within: Right here's a photo of the outside of the garage wall surface exhaust follower, showing the vents open with the follower on: I'm really delighted concerning our new garage exhaust fan.
We had a light snow shower (regarding 4 inches), therefore I burst out the snowblower to attempt it out. As forecasted, when I ended up removing the snow from the driveway and place away the snowblower in the garage, the still-warm engine started to have an odor up the garage. I involved the new exhaust fan for a few hours, and the garage was back to normal.
The overall expense of placing the air vent fan in the garage was around $150 and was jointly regarding a day's worth of job. If you want exhaust fans in the garage, this tutorial will certainly have your brand-new garage wall exhaust fan up and running quickly! I was really delighted with the garage vent fan.
Exhaust Fan Installer Near Me Beverly Hills, CA
I did include one more thing to our garage vent fan. I had been by hand turning the fan on and off as needed. Sometimes I left it running longer than I expected. I desired a better system of turning the follower off. I ended up acquiring an digital timer button and connected the follower into it.
Of training course you desire to make sure that the means the fan is transformed on is practical to you. Currently is the time to pick.
It may deserve it to run an air duct just to require the air to move across. If you desire to obtain elegant, you could include some degreee of filtering. This is outside the scope of your question but I constantly like to make sure a work location is well lighted with lots of lumens and as little glow as possible.
An exhaust follower's capacity is the quantity of air it can relocate, which is gauged in cubic feet per min (CFM).
Carbon Monoxide Detector Installation Beverly Hills, CA
Are you thinking concerning a do it yourself garage exhaust fan setup yet uncertain if it's really necessary? Allow's damage down the advantages and assist you choose if it's the appropriate action for you. A great garage exhaust fan can do far more than keep points great. Here are a few of the essential advantages: Exhaust followers eliminate contaminants, fumes, and smells that can build up in your garage.
However, you might need to increase the ability if you run a shop that produces great deals of fumes or dust. You have actually obtained a couple of choices when it involves the kind of follower: These are usual and reasonably easy to install. They go on your garage wall surface and remove the air with the outside wall surface.
Exhaust Fan Installation Service Beverly Hills, CA
Now for the enjoyable partinstalling the follower! You'll need points like: Safety glasses and handwear covers The exhaust fan itself A measuring tape Wire adapters Wire cutters Screwdrivers A pencil Screws Jigsaw A drill Security first, individuals!
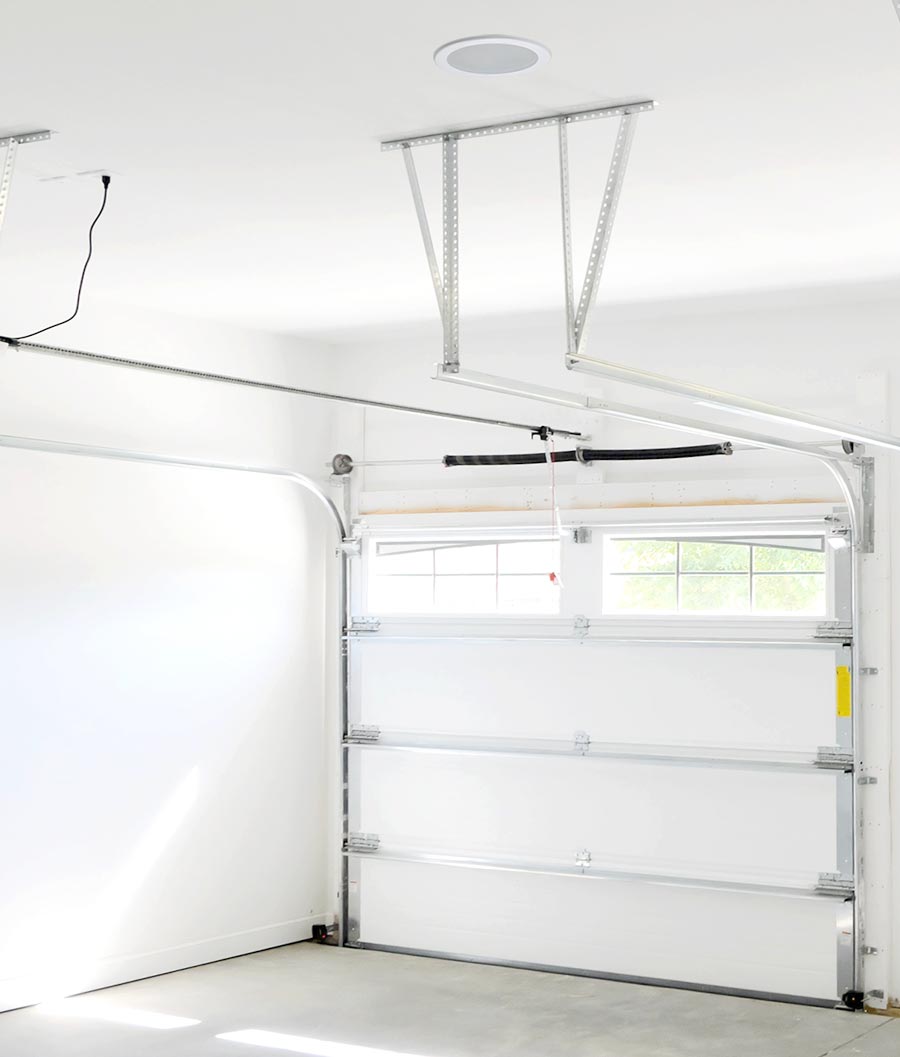
Do you desire it on the wall or the garage ceiling? If you're placing it on the wall, ensure it's high enough that you won't bump your directly it. If you're putting it on the ceiling, ensure it's in an area where it will give great air movement. Once you have actually picked your spot, you should cut a hole in the wall surface or ceiling.
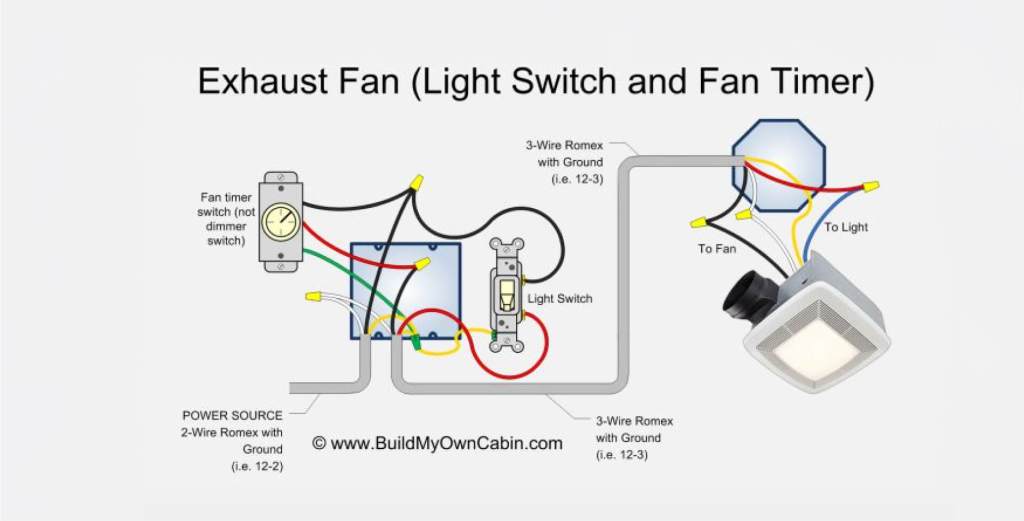
Currently, it's time to attach the fan to the electric circuitry. The complying with photo shows an example circuitry representation for an exhaust fan and light regulated by a button and timer.
Instant Air Solutions
Address: 412 W Dryden St Apt 6 Glendale, CA 91202Phone: (747) 307-6363
Email: instantairsolutionsinc@gmail.com
Instant Air Solutions
After mounting the follower, secure any kind of spaces around the housing with caulk or weatherstripping. Doing so prevents air leaks and maintains out pests, ensuring your fan runs successfully. Next off, transform the power back on and evaluate the fan. Check fan rate and guarantee air spurts of your garage, not in.
Exhaust Fan Installation Near Me Beverly Hills, CAWarehouse Ventilation Systems Beverly Hills, CA
Garage Ventilation Fan Installation Beverly Hills, CA
Garage Exhaust Vent Beverly Hills, CA
Exhaust Fan Installer Beverly Hills, CA
Near My Location Seo Management Beverly Hills, CA
Finding A Local Seo Company Beverly Hills, CA
Exhaust Fan Installer Near Me Beverly Hills, CA
Instant Air Solutions
Table of Contents
- – Carbon Monoxide Detector Installation Beverly H...
- – Instant Air Solutions
- – Industrial Exhaust Ventilation Systems Beverly...
- – Exhaust Fan Installers Near Me Beverly Hills, CA
- – Garage Wall Exhaust Fan Beverly Hills, CA
- – Garage Exhaust Fan Beverly Hills, CA
- – Industrial Air Ventilation Systems Beverly H...
- – Exhaust Fan Installer Near Me Beverly Hills, CA
- – Carbon Monoxide Detector Installation Beverl...
- – Exhaust Fan Installation Service Beverly Hil...
- – Instant Air Solutions
Latest Posts
Rv Repairs Near Me Placentia
Recreational Vehicle Repair Montclair
Commercial Hood Installation Burbank
More
Latest Posts
Rv Repairs Near Me Placentia
Recreational Vehicle Repair Montclair
Commercial Hood Installation Burbank